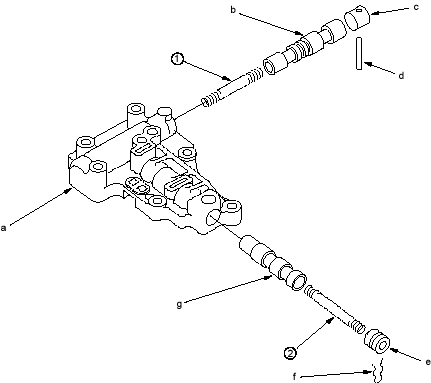
Valve Body

Lock-up Valve Body Disassembly, Inspection and Reassembly

14-189  

  1. Clean all parts thoroughly in solvent or carburettor cleaner and dry them with compressed air. Blow out all passages.
  2. Check all valves for free movement. If any fail to slide freely, refer to Valve Body Repair (see page 14-181).
  3. Replace the valve body as an assembly if any parts are worn or damaged.
  4. Coat all parts with ATF during assembly.
    1. LOCK-UP VALVE BODY

      Inspect for scoring and damage.

    2. LOCK-UP SHIFT VALVE
    3. VALVE CAP
    4. ROLLER
    5. VALVE CAP
    6. VALVE CAP CLIP
    7. LOCK-UP TIMING VALVE

SPRING SPECIFICATIONS

No. Spring Standard (New)-Unit: mm (in.)
    Wire Dia. O.D. Free Length No. of Coils
(1) Lock-up shift valve spring 0.9 (0.035) 7.6 (0.299) 73.7 (2.902) 32.0
(2) Lock-up timing valve spring 0.9 (0.035) 8.1 (0.319) 80.7 (3.177) 54.2