- Raise the glass fully.
- Remove these items:
- Door panel (see page 20-15)
- Plastic cover, as necessary (see page 20-5)
- Rod protector, for some models (see step 3 on page 20-16)
- Remove the screws securing the latch (see step 5 on page 20-17).
- With power door lock, disconnect the actuator rod (A) and connector (B), then remove the actuator (C).
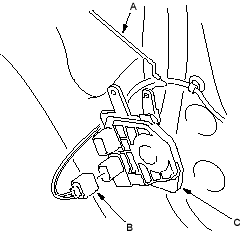
- Disconnect the lock rod (A) from the lock crank (B).
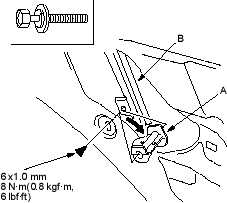
- Remove the bolt, then remove the collar (A) from the centre channel (B).
Fastener Location  : Bolt, 1
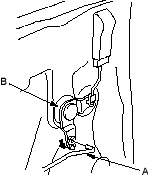
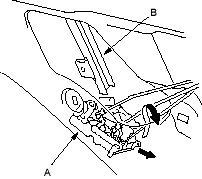
- Move the latch (A) through the gap between the centre channel (B) and door, then remove it. Take care not to bend any of the rods.
- If necessary, remove any of the rods from the latch.
- Install the latch in the reverse order of removal, and note these items:
- Make sure the connector is plugged in properly (with power door lock), and each rod is connected securely.
- Make sure the door locks and opens properly.

