Trim pad remover, Snap-On # A 177 or equivalent, commercially available.
- If applicable, remove the regulator handle (A) by pulling the clip (B) out with a wire hook (C).
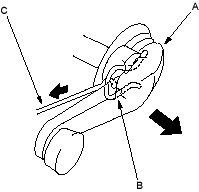
- Remove the inner handle (A). Take care not to scratch the door panel.
- Pry out on the upper portion of the cover (B) to release the hooks (C, D), then remove the cover.
- Remove the screws.
- Pull the inner handle forward and out half-way to release the hook (E).
- Disconnect the inner handle rod (F) and power door lock switch connector (G) (driver's for some models).
Fastener Locations  : Screw, 2
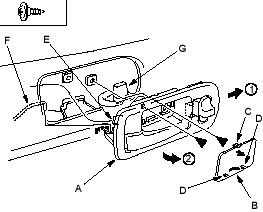
- Remove the grip cover (A). To remove the passenger's grip cover, refer to rear door panel removal and installation (see page 20-15).
- Using a flat-tip screwdriver wrapped with protective tape, pry out the front edge of the cover to release the clips (B).
- Pry out along the bottom to release the lower hooks (C).
- Pry out along the top to release the upper hooks (D), and release the clip (E) while pulling the cover forward.
Fastener Locations C  : Hook, 7
D : Hook, 5
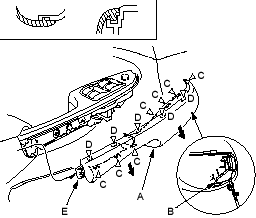
- Driver's door: Disconnect the power window switch connector (A) (for some models). Remove the screws from the grip base (B).
Fastener Locations : Screw, 2
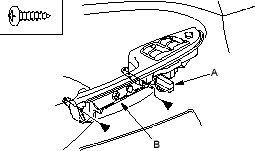
- Remove the mirror mount cover (see step 2 on page 20-33).

