- Apply protective tape to the body (A). Using a flat-tip screwdriver wrapped with protective tape (B), pry up on the roof moulding (C). Take care not to scratch the body.
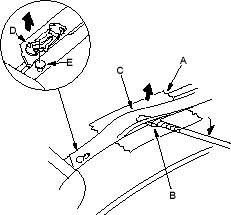
- Pull up and slide the roof moulding to release the front bracket (D) from the pin (E).
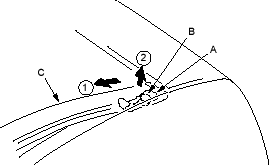
- Pull up the front portion of roof moulding.
- Pull up and release the rear bracket (A) from the pin (B), then remove the roof moulding (C).
- Install the moulding in the reverse order of removal and note these items:
- Take care not to damage the windshield moulding.
- Make sure the roof moulding is installed securely.