- Install the special tool as shown. Insert the jaws carefully, making sure not to damage the ball joint boot. Adjust the jaw spacing by turning the pressure bolt (B).
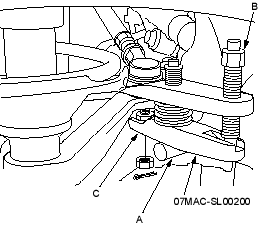
- After adjusting the adjusting bolt, make sure the head of the adjusting bolt (A) is in the position shown to allow the jaw (C) to pivot.
- With a wrench, tighten the pressure bolt until the ball joint pin pops loose from the steering arm or knuckle. If necessary, apply penetrating type lubricant to loosen the ball joint pin.
- Remove the tool, then remove the nut from the end of the ball joint pin and pull the ball joint out of the steering arm or knuckle. Inspect the ball joint boot and replace it if damaged.
The dampers contain nitrogen gas and oil under pressure. The pressure must be relieved before disposal to prevent explosion and possible injury when scrapping. |
 WARNING
WARNING Always wear eye protection to avoid getting metal shavings in your eyes when the damper pressure is relieved. |
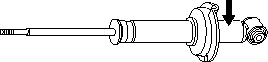
Place the damper on a level surface with its shaft extended and drill a hole of 2 – 3 mm (0.078 – 0.118 in) diameter in the body to release the gas.
Front damper:
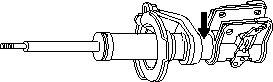
Rear damper: